Home › Recipes › Holiday Recipes
Brie Cheese Bites

By Snejana Andreeva
on Dec 06, 2024, Updated Dec 27, 2025

I swear half the holiday excitement for me is making fun and festive snacks 🎄 – the creativity is endless. When I think of Christmas apps, Brie cheese is basically the first thing that pops into my head. It’s like the VIP of holiday cheeses — melty, gooey, and the perfect match for both sweet and salty.
- Why You’ll Love Brie Cheese Bites
- How to Prepare
- Nonna’s Tip 🔪
- Variations and Substitutions for Brie Cheese Bites
- Similar Recipes
- Best Cheese to Use?
- Best Served With
- Common Questions
- Brie Cheese Bites Recipe
My festive Brie Cheese Bites are not only super tasty, they’re a full-on holiday experience and a great way to keep the kids busy! Imagine a tiny Christmas tree, made entirely of cheese 🧀, nuts, and dried fruit. These bite-sized beauties are the ultimate holiday appetizer: rich, creamy Brie paired with the sweet and salty crunch of nuts and dried fruit. Some would say they are Brie-lliant 😉!

Why You’ll Love Brie Cheese Bites
Picture this: the creamy, smooth texture of the Brie cheese 🧀 that practically melts in your mouth, dipped into golden, silky honey 🍯. Now, top this already dreamy pairing with a mix of chopped pistachios and dried cranberries. I mean, come onnnnnn!
The pistachios bring a savory crunch , with a subtle nutty flavor that goes perfectly with the Brie’s creaminess. The cranberries add just the right amount of tartness and chewiness , cutting through the richness of the cheese and balancing ⚖️ the whole bite. Friends, these Brie Cheese Bites are the sweet and salty appetizer you’ve been waiting for.
How to Prepare
🔪 Take a wheel of Brie cheese, place it on a cutting board , and use a knife to cut it into 8 equal triangles.
▶️ Then take each triangle and place it on its side.
👩🍳 Cut it down the middle so that one side of the triangle has the rind and the other has the cream. Repeat this step for all eight brie triangles, so you have 16 equal triangles.
🥨 Now, take a pretzel stick and insert it in the middle of the widest part of the brie triangle, resembling a Christmas tree. Repeat this step for each one.

🌀 Next, add the pistachios and dried cranberries into a food processor . Process until fine. Add onto a plate and set aside.
🍯 Pour some hot honey (spicy honey) onto a plate, take each “brie tree” and dip into the honey with the creamy side of the cheese.
🎄 Now dip each one into the nut and cranberry mixture and plate them up!

Nonna’s Tip 🔪
If your cheese is sticking to the knife when cutting, you can dry dipping the knife in warm water before slicing. Also be sure to wipe the knife clean between cuts for smooth slices.

Variations and Substitutions for Brie Cheese Bites
- Instead of hot honey, you can absolutely use regular 🍯 honey, agave syrup or even 🍁 maple syrup for this recipe.
- You can use any nuts instead of pistachios. Have fun with different flavor combos!
- Make these nut-free by using a seed such as pumpkin or sunflower seeds.
- Try other dried fruits such as dried apricots, dried 🍒 cherries, or raisins instead.
Similar Recipes
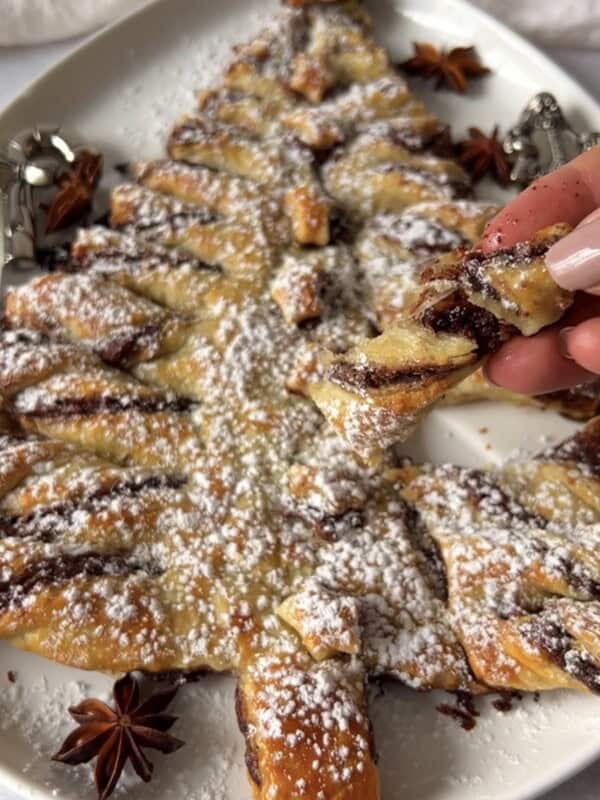
Puff Pastry Christmas Tree
35 mins

Garlic Bread Christmas Tree
30 mins

Christmas Tree Cheese Ball
20 mins
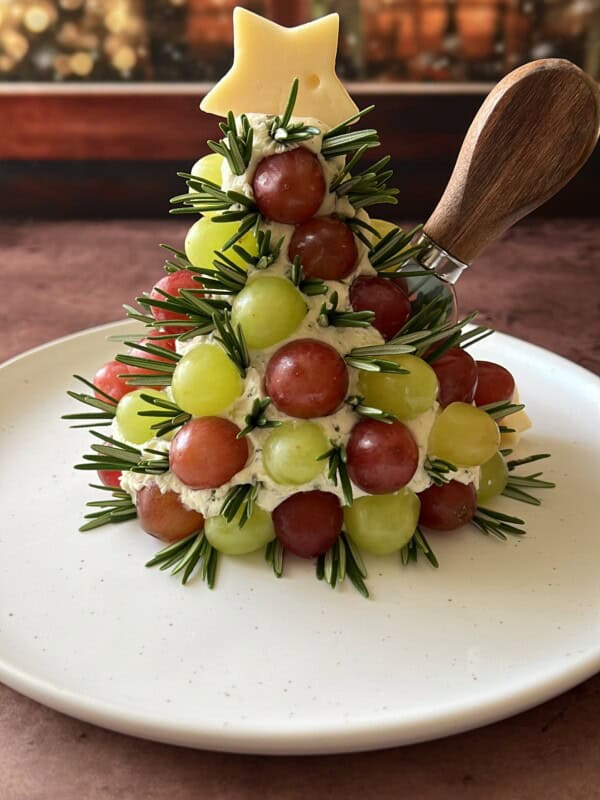
Grape Christmas Tree Cheese Ball
15 mins

Holiday Candy Cane Prosecco
5 mins

Antipasti Christmas Wreath
10 mins
Best Cheese to Use?
If you’re out of Brie, no problem! Laughing Cow Cheese Wedges are a convenient swap since they’re already the perfect size and shape (you won’t have to slice them in half either). You can also use a white cheese like Provolone, Swiss, or Mozzarella, cutting them into triangles for the same effect. And if you’re feeling fancy, Camembert is a great alternative to Brie, offering a similar creamy texture and rind for that elegant touch.
Best Served With
- Serve these Brie Cheese Bites with a beautiful charcuterie board. For some inspo, see my: Simple Charcuterie Board , Holiday Charcuterie Board or Holiday Cheese Board .
- Serve with some wine or 🥂 champagne for a festive treat.
- Serve on a beautiful platter with some 🥖 crostini.
- You can have these pre-arranged on these cute individual charcuterie 🍷 wine glass toppers with some crackers.
Common Questions
You could use Laughing Cow Cheese wedges, any white cheese cut into triangles, or Camembert as well.
If you don’t have a food processor, you can certainly chop the pistachios and cranberries by hand with a knife until small.
Not at all! Feel free to use regular honey, maple syrup or even agave syrup.
No worries! Use regular honey and add a pinch of chili flakes or a dash of hot sauce to create your own spicy honey.
Absolutely! Replace pistachios with crushed seeds (like sunflower or pumpkin) or simply skip them and use only cranberries.
Definitely! Dried cherries, apricots, or raisins would work well as substitutes for cranberries.
If your cheese is sticking, you can dry dipping the knife in warm water before slicing. Also, be sure to wipe the knife clean between cuts for smooth slices.
A New Recipe Card!!
- Check off each step in instructions!
- Add ingredients to your shopping list!
Video
Equipment
- ▢ Nakiri Knife
- ▢ Cutting Board
- ▢ Measuring Cups + Spoons
- ▢ Cordless Food Chopper
Ingredients
- ▢ 300 grams Brie cheese , I used double cream, nothing too soft
- ▢ ¼ cup hot honey , or regular
- ▢ ⅓ cup pistachios
- ▢ ⅓ cup dried cranberries , craisins
- ▢ 16 pretzel sticks
Instructions
- ▢ Take a wheel of Brie cheese, place it on a cutting board and cut it into 8 equal triangles. Take each triangle and place it on its side.
- ▢ Cut it down the middle so that one side of the triangle has the rind and the other has the cream. Repeat this step for all eight brie triangles.
- ▢ Once cut, you should be left with 16 equal triangles.
- ▢ Now, take a pretzel stick and insert it in the middle of the widest part of the brie triangle, resembling a Christmas tree. Repeat this step for each one.
- ▢ Next, add the pistachios and dried cranberries into a food processor. Process until fine. Add onto a plate and set aside. Feel free to chop them by hand with a knife until fine if you don’t have a food processor at home.
- ▢ Pour some hot honey (spicy honey) onto a plate, take each “brie tree” and dip into the honey with the creamy side of the cheese.
- ▢ Now dip each one into the nut and cranberry mixture and plate them up! I like to use mint for garnish to make the plate look pretty but feel free to use herbs like thyme or rosemary instead.
- ▢ Enjoy with an extra drizzle of honey on top 😋!
My Notes
Nutrition
Nutrition information is automatically calculated, so should only be used as an approximation.
Brie Cheese Bites
Equipment
- Nakiri Knife
- Cutting Board
- Measuring Cups + Spoons
- Cordless Food Chopper
Ingredients
- 300 grams Brie cheese I used double cream, nothing too soft
- ¼ cup hot honey or regular
- ⅓ cup pistachios
- ⅓ cup dried cranberries craisins
- 16 pretzel sticks
Instructions
- Take a wheel of Brie cheese, place it on a cutting board and cut it into 8 equal triangles. Take each triangle and place it on its side.
- Cut it down the middle so that one side of the triangle has the rind and the other has the cream. Repeat this step for all eight brie triangles.
- Once cut, you should be left with 16 equal triangles.
- Now, take a pretzel stick and insert it in the middle of the widest part of the brie triangle, resembling a Christmas tree. Repeat this step for each one.
- Next, add the pistachios and dried cranberries into a food processor. Process until fine. Add onto a plate and set aside. Feel free to chop them by hand with a knife until fine if you don’t have a food processor at home.
- Pour some hot honey (spicy honey) onto a plate, take each “brie tree” and dip into the honey with the creamy side of the cheese.
- Now dip each one into the nut and cranberry mixture and plate them up! I like to use mint for garnish to make the plate look pretty but feel free to use herbs like thyme or rosemary instead.
- Enjoy with an extra drizzle of honey on top 😋!
Video
Nutrition
Brie Cheese Bites https://themodernnonna.com/brie-cheese-bites/ December 6, 2024
Home › Recipes › Cookies & Snacks
Lemon Cheesecake Thumbprint Cookies
By Snejana Andreeva
on Dec 15, 2022, Updated Nov 08, 2023
My lemon cheesecake thumbprint cookies melt in your mouth . This recipe is one of those recipes that you’ll need to triple, because it’s THAT good. 🍋Whether you’re a lemon lover or simply looking for a unique and delicious cookie, these Lemon Cheesecake Thumbprint Cookies are a must-try. They’re perfect for any occasion, from a casual afternoon tea to a fancy dessert spread.
- Why You’ll Love Lemon Cheesecake Thumbprint Cookies
- How to Prepare
- Nonna’s Tip 🍋
- Lemon Cheesecake Thumbprint Cookies Variations and Substitutions
- Other Holiday Recipes
- More Holiday Cookies
- Common Questions
- Lemon Cheesecake Thumbprint Cookies Recipe
Why You’ll Love Lemon Cheesecake Thumbprint Cookies
These lemon cheesecake thumbprint cookies are ideal for anyone who cannot tolerate 🥚 eggs as they are completely egg-free . The dough takes 5 minutes to whip up, so these cookies are easy enough for anyone who is not even a baker. They’re only 5 ingredients , which you probably already have on hand. I can honestly say that this is one of those cookie recipes that you cannot get enough of.
How to Prepare
🥣 Use a stand mixer with the paddle attachment or a hand-held mixer and bowl to cream butter and cream cheese for about 2 minutes until smooth.
🍋 Add sugar and lemon extract and mix until smooth . Then add flour, and mix until a sticky dough forms. Scrape down the sides to fully incorporate any remaining flour.
🧊 Cover the cookie dough with plastic wrap and refrigerate for one hour.
🥄 Remove dough from the refrigerator, use a small ice-cream scooper to portion the cookies, rolling each in a touch of flour to prevent sticking.
🍓 Place rolled cookies on a baking sheet lined with parchment paper . Flatten each with your thumb, creating an indent, and add a teaspoon of preferred jam/preserve to the center.
🔥 Preheat the oven to 350°F and bake the lemon cheesecake thumbprint cookies for 13-15 minutes or until the edges are light and golden brown .
❄️ Allow the cookies to cool completely and optionally dust with icing sugar. They can be stored at room temperature for up to a week.
Nonna’s Tip 🍋
You MUST refrigerate the cookie dough for at least one hour and you have to use a touch of flour to roll each one as they will stick.

Lemon Cheesecake Thumbprint Cookies Variations and Substitutions
- Try adding a decorative topping like chopped nuts or a sprinkle of coarse sugar for holiday decoration.
- I have not tried this recipe with gluten-free flour , but feel free to experiment with a gluten-free 1-1 replacement and let me know how it goes!
- Instead of lemon extract , you could try almond, vanilla, orange or another you have on hand.
- Feel free to experiment with different jams or preserves , for example, you could use strawberry, raspberry, apricot or even marmalade.
- You could try dairy-free or vegan alternatives to the butter and cream cheese if you or your guests have allergies.
Other Holiday Recipes
Antipasti Christmas Wreath
10 mins

Holiday Butter Board
20 mins
Holiday Candy Cane Prosecco
5 mins

Holiday Cheese Board
20 mins
More Holiday Cookies
Looking for an even fancier-looking cookie? Try my puff pastry cookies .

Easy Gingerbread Cookies
3 hrs 23 mins

Italian Amaretti Cookies
25 mins

3 Ingredient Sugar Cookies
20 mins

Shortbread Butter Cookies
27 mins
Common Questions
Feel free to use any jam or preserve you enjoy. I love fig or apricot but you are more than welcome to use any you have on hand.
The lemon extract is optional so don’t worry if you don’t have any on hand. You can also use pure vanilla extract, or almond extract, or leave them plain. Or, if you don’t have pure lemon extract, but still want the flavor, you can also use the zest of a lemon in the recipe.
You MUST refrigerate the cookie dough for at least one hour and you have to use a touch of flour to roll each one as they will stick.
Feel free to freeze the cookie dough tightly wrapped for up to 3 months. Thaw in the fridge and shape as usual.
The cream cheese and butter must be softened in order for the cookies to bake correctly.
You can use salted or unsalted butter. I have made them with both and both results are delicious.
While 1 cup of flour weighs 160g in my kitchen, it might weigh anywhere from 120 to 180g in your kitchen and there’s a few reasons for that. The weight of ingredients may vary due to the brand of ingredients, the brand and style (wet vs dry) of measuring cups and spoons, and the technique for measuring into cups: scooping and leveling versus spooning the ingredients into the cup measure. For best results, go by the weight listed in the recipe.
A New Recipe Card!!
- Check off each step in instructions!
- Add ingredients to your shopping list!
Video
Equipment
- ▢ Measuring Cups + Spoons
- ▢ Mixing Bowls
- ▢ Baking Sheet
- ▢ Parchment Paper
Ingredients
- ▢ ½ cup cream cheese , softened
- ▢ ½ cup white sugar
- ▢ 1 stick softened salted butter
- ▢ 1.5 teaspoons lemon extract , optional if you don’t have any on hand
- ▢ 1 ¼ cup all-purpose flour , + 2 extra tablespoons for rolling the balls
- ▢ 18 teaspoons jam , I used fig preserve
Instructions
- ▢ In a stand mixer using the paddle attachment, cream the butter and cream cheese together for about 2 minutes or until smooth. You can also use a hand-held mixer and a bowl as well.
- ▢ Once creamy, add the sugar and lemon extract and mix until smooth. Add in the flour and mix until a sticky dough forms. If there’s any flour on the sides, you can scrape it down and mix again until fully incorporated.
- ▢ Cover the cookie dough with plastic wrap and refrigerate for one hour. After an hour, take out the dough, remove the plastic and use a small ice-cream scooper to scoop out the cookies. I scoop each cookie, roll it in a touch of flour as it will stick to your hands if you don’t.
- ▢ Repeat this step for all 18 cookies. Place each rolled cookie onto a baking sheet lined with parchment paper. Press each one down with your thumb to make an indent. Add a teaspoon of any jam/preserve you like to the middle.
- ▢ Preheat the oven to 350F and bake until the edges are light and golden brown. This should take 13-15 minutes depending on the oven.
- ▢ Let them cool completely and optionally dust with icing sugar. These are perfectly stored at room-temp for up to a week.
My Notes
Nutrition
Nutrition information is automatically calculated, so should only be used as an approximation.
